I recently published a playlist of 76 Google Docs tutorials. But you certainly don’t need to use all of the features of Google Docs demonstrated in that playlist let alone watch all of the videos. In fact, I’m often asked for a list of the “must-know” features instead of all of the “could use” features. Here are ten features that new users can benefit from learning early on.
1. Font options
Besides the default options in the font drop-down menu there are hundreds of other options available when you choose “more fonts” at the top of that menu. And while we’re on the topic of fonts, it is possible to change the default font.
2. Page orientation
In the “File” drop-down menu you’ll find a “page setup” option that allows you to change page orientation, set margins, and even change the page background color.
3. Find and Replace (Ctrl + H)
The next time you find yourself sitting down to start writing summative reports before parent-teacher conferences, create a template that you can quickly modify for each student. Then you can use the find and replace function to quickly change names, adjectives, and even entire sentences without having to create each report from scratch.
4. Personal dictionary
In the “tools” menu select “personal dictionary” to teach the spell check to ignore the spelling of names or other words that are often marked incorrect by spell check despite being spelled correctly. For example, the last name of a friend of mine is Wankowicz, that name is never recognized by spell check unless the spell check is customized through the “personal dictionary” function.
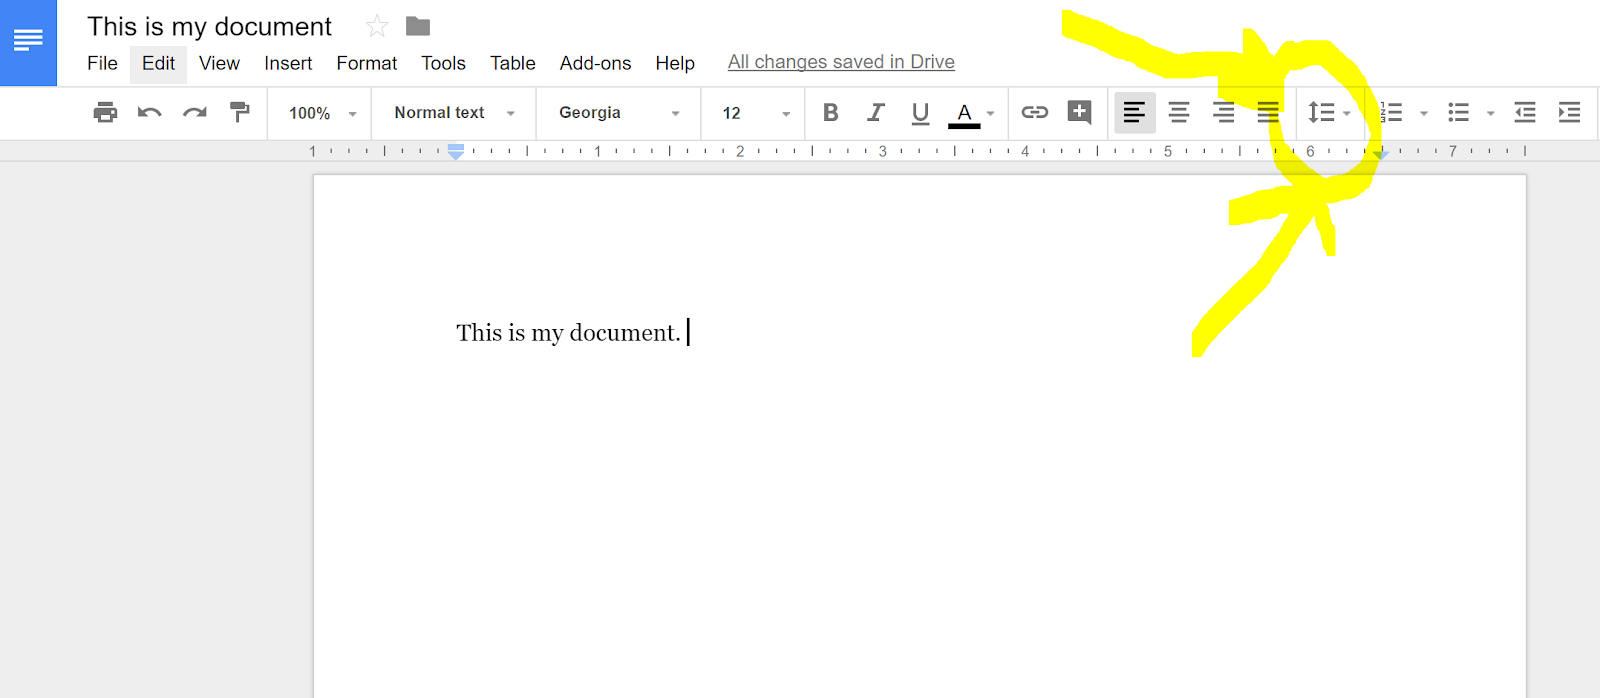
5. Custom spacing
The default line spacing in Google Docs is 1.15. You can change that to anything you like, if you know where the line spacing settings are found. You can find the settings in the “format” menu. You can also find it in the toolbar. See the screenshot below for direction on finding the line spacing settings in the toolbar.
Click image to enlarge.
6. Version history
This feature was formerly called “revision history.” Select “version history” to find the various iterations of your document. You can set different names for each version. This is a great feature for seeing the evolution of a student’s document.
7. Adding collaborators
Click the “share” button in the upper, right corner of your document to invite people to become collaborators on your document. You can give people full access to edit your document or you can restrict them to only being able to make suggestions and comments on your document.
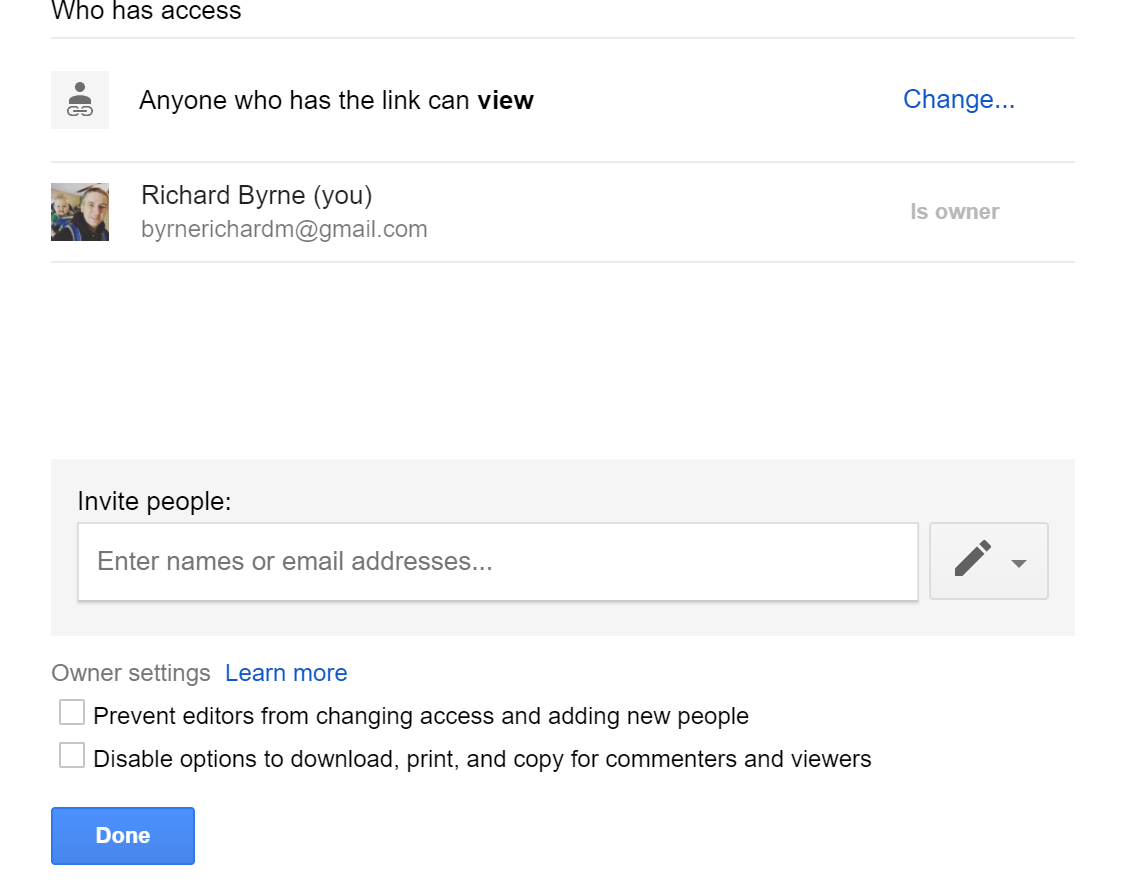
8. Lock shared documents
Google Docs includes the option to make your document available for anyone to view even if they don’t have Google accounts. But just because people can view your document it doesn’t mean that they have to be able to make copies of or print your document. Use the “advanced” option on the sharing menu to disable the option to print or copy your public documents.
Click image to enlarge.
9. Insert drawings
Need to insert a signature? Want to quickly add a flow chart to a document? Use Google Drawings within your document. You’ll find that option in the “insert” drop-down menu.
10. Export your document.
Prefer to print a PDF? Have someone who insists that you send him or her a Word file attached to an email instead of using Google Docs? You can do both of those things by selecting “download as” in the File menu.