In the digital world, blogging has emerged as a potent educational tool, combining creativity, interaction, and in-depth exploration of topics. By incorporating blogging into your pedagogical repertoire, you can not only elevate your teaching methods but also unlock an array of learning opportunities for your students. 

Educational blogging offers a multitude of avenues to enrich your instructional techniques. You can use it as a platform to showcase students’ accomplishments, share resources beyond the curriculum, establish a virtual hub for remote student interactions, and maintain a consistent line of communication with parents and the wider school community. 


Moreover, it can serve as an extension of the classroom environment, a space where learning continues beyond the school day. It’s also a convenient way to disseminate assignments, announcements, and important dates or events. 

When integrating blogging into your pedagogical approach, it’s crucial to ground this digital tool within a structured pedagogical framework, clearly outlining objectives and learning goals. Equipping yourself with tailor-made blogging rubrics can assist you in assessing students’ learning and monitoring their overall academic journey. 

There is a plethora of blogging platforms  available to assist you in establishing your classroom blog. Among them, Google’s Blogger stands out as one of the most user-friendly and efficient platforms. 

In this post, I will provide a comprehensive, step-by-step guide to setting up your classroom blog using Blogger. This will serve as a roadmap for you to navigate this exciting digital terrain and bring your classroom into the modern age.

1- Blogger login

To start creating your blog in Blogger you need to first log in to Blogger. If you have a Google account then it is easy. Head over to www.blogger.com and log in. Once logged in, click on ” New Blog “.

2. Add a Blog title

Provide a title for your blog and type in the address you want to use as URL. Try different iterations till you find the one that is available. 

3- Choose a template

Blogger’ s template gallery features tons of professionally designed templates that you can choose from. These templates are organized into different themes including: Travel (e.g, Flight template, Beach template, Studio template, and Road template), Dynamic views (includes Magazine template, Flipcard template, Classic template, Snapshot template, Mosaic template, etc), Simply (includes Simply Simple, Pale, Deep, Literate, Dark, etc), Picture Window (Shade, Open, Sceen, and more), Watermark (e.g., Navigator, Birds, Flower, etc), Notable (includes Light, Dracula, Coral, Antique, and Pink), Emporio (includes Porcelain, Toolbox, Apron, Flamingo, and Technica), and more.

When you find the template you want click on ‘Apply’.


3- Blogger editor

Now that you have selected and applied a template to your classroom blog, your blog is now virtually existant, congrats!

From now on, Blogger editor is where you will  be working to write content and customize the settings of your blog. Think of it as the backdoor to your blog. 

To start writing posts, you can either write your post in Blogger editor which offers all the basic writing and editing tools you need or you can use a text editor of your choice (e.g. Word, Text Edit, Google Docs, Scrivener, etc) then copy and paste your post into your Blogger editor.


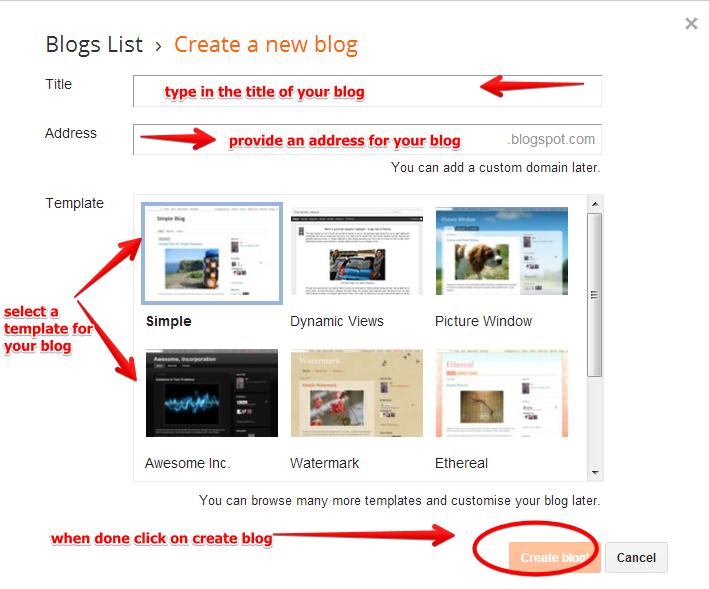
Here is what you can do in the editor :
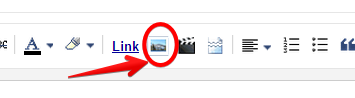
A- Insert Image


To insert an image click on the image icon as shown in the screenshot below. You have four options to insert an image into your post including: Upload from computer, Photos, Blogger, and by URL.
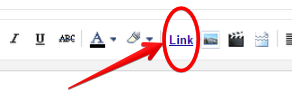


B- Add a hyperlink


To hyperlink a word, that is, to add a URL address that people can visit when they lick on the word, simply highlight the word or phrase then click on “Link” in the authoring bar  and paste  your link. If you want the link to open in a new window make sure you check the box next to ‘Open this link in a new window’


C- Insert Videos


There are two ways to insert videos into your blog post. You can add them from your computer or you can insert them from YouTube. Check out this guide  to learn how the different ways to add videos to your blog posts.
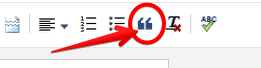
D- Add a quote


To add quotes to your post, paste or type in your quote and click on the ‘quote’ icon as shown below.
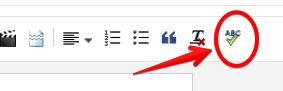

E- Check spelling


Blogger has an integrated spell checker which works best when you click on  the “ABC” icon as shown below. When you click on ABC,  any misspelled  word will be highlighted in yellow, simply click on the word to automatically correct it. 
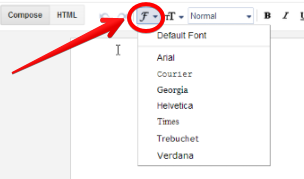


F- Choose Font type


To select the font of your text, click on the font icon and pick up the font you want. 
To select the font of your text, click on font icon and pick up the font you want.


G- Change font size


To change the font size of your text , click on the font size icon and choose the size you want.
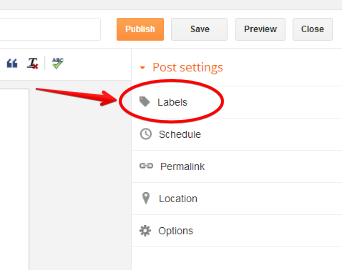


H- Label your post


Labels help you organize your posts into different categories. For instance, if I write a tutorial I would label my post as : tutorial or guide…etc so that when I have several posts and want to look for a specific one I can easily find it based on the labels I used.
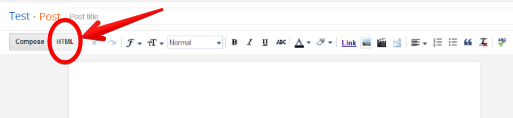

I- HTML 

I am not sure if you would want to tweak the HTML of your post unless you have a basic knowledge of HTML coding, otherwise don’t bother. HTML is useful when integrating code snippets  into your posts (e.g.,  infographics, embed videos, slides, etc)


5- Share your Post 

Once you are done with typing and editing, you can then click on ” Publish” and your post will instantly go live.


Here is how to customize the settings of your Blog

1- Add co-authors

To add co-authors to your blog, click on  Settings located on the left hand side. Scroll down to Permissions and click on ‘Invite more authors’.  Add their email addresses and click on Send. 

2- Set Blog readers


You can either make your blog open to the public, private or accessible only by custom readers.  To adjust the readership settings of your blog,  Click on Settings, scroll down to Permissions and click on Reader access. Choose one of the three options: Public, Private to authors, Custom readers.


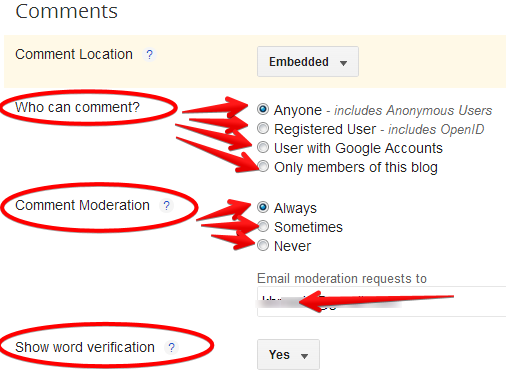
3- Adjust Comment features


By default your blog will display a comment box below your posts. But you have full moderation control. You can adjust who can write comments, whether to moderate comments before they are published, whether to enable a word verification captcha, and more.


To adjust comment features, open Settings, scroll down to Comments and adjust the features to your preference.


More sources:
How to create and edit pages in Blogger (video tutorial by Blogger team)
How to publish a blog post (video tutorial by Blogger team)
How to choose who can read and edit your blog (video tutorial by Blogger team)
How to purchase a custom domain on Blogger (video tutorial by Blogger team)